Responsive Ads Here

Saturday, May 12, 2018

A couple years ago we did a tutorial on Hacking Tutorials on how to install the popular vulnerability assessment tool OpenVAS on Kali Linux. We’ve covered the installation process on Kali Linux and running a basic scan on the Metasploitable 2 virtual machine to identify vulnerabilities. In this tutorial I want to cover more details about automated vulnerability scanning starting with the installation process followed by setting up targets, running internal and external scans and finally define custom scanning configurations. Due to the length of the full tutorial we’ll split it into 2 or 3 parts that will be published in the upcoming weeks. In part 1 of this tutorial I want to cover the installation of the most recent version of OpenVAS 9.0, which was released in 2017. The latest version 9.0 introduces a new web interface which offers end users better ways to manage scanning options, assets and workflows through the web interface. In this tutorial we will walk through the installation process on Kali Linux, so we can run vulnerability scans from our own device, and as virtual appliance in a network. The virtual appliance can be installed in a network environment to have it periodically run automated scans on devices present on the network. In part 2 of ‘Vulnerability Scanning with OpenVAS 9.0’ I want to dive a little bit deeper into vulnerability scanning with this tool by configuring targets, assets and custom scanning configurations. Vulnerability Scanning with OpenVAS 9.0 part 2 is expected to be published on May 9 2018.
Before we can start configuring vulnerability scans we have to install OpenVAS first. We can do this with a package manager or by installing the OpenVAS appliance on VMware Workstation/ESXi, Oracle VirtualBox or Hyper-V. In the first part of this tutorial we’ll use APT on Kali Linux and then we will set up the appliance on VMware. As far as virtual machine resources are concerned, we’ve dedicated 2 GB of RAM and 2 processor cores to the Kali Linux VM which should be sufficient to run some basic scans smoothly with a limited number of signatures on a limited number of targets.

Installing Openvas 9 on Kali Linux

To install Openvas 9 and its dependencies on our Kali Linux system we simply have to run the following command:
apt-get update && apt-get install openvas
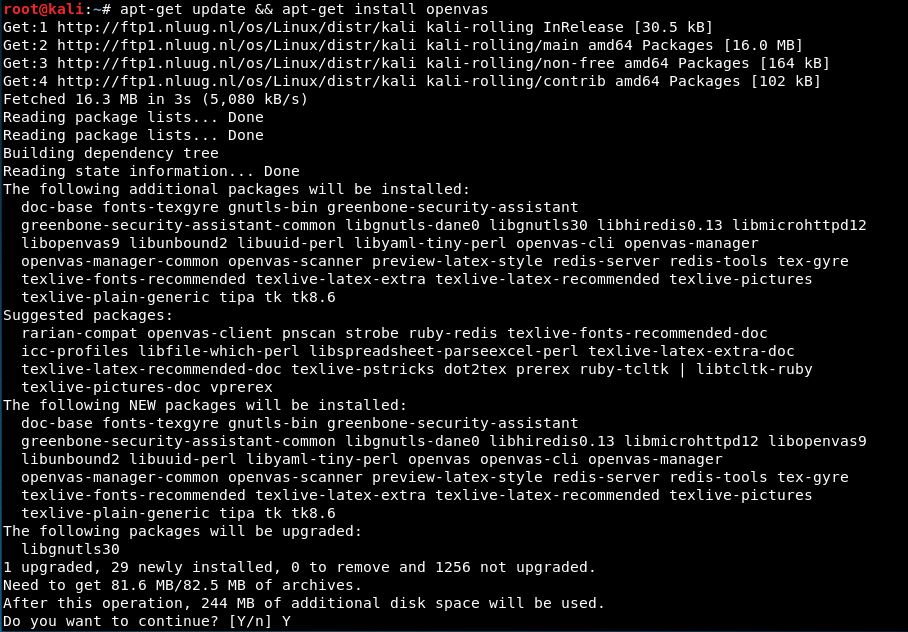
Press ‘Y’ to continue the installation of OpenVAS and dependencies.
The next step to run the setup procedure that will setup OpenVAS and download a large number of Network Vulnerability Tests (NVTs) or signatures. Due to the large number of NVTs (50.000+) the setup procedure might take a while to complete and consume a considerable amount of data. On the test setup we’ve used for this tutorial the total setup procedure took 10 minutes to complete which is not bad at all.
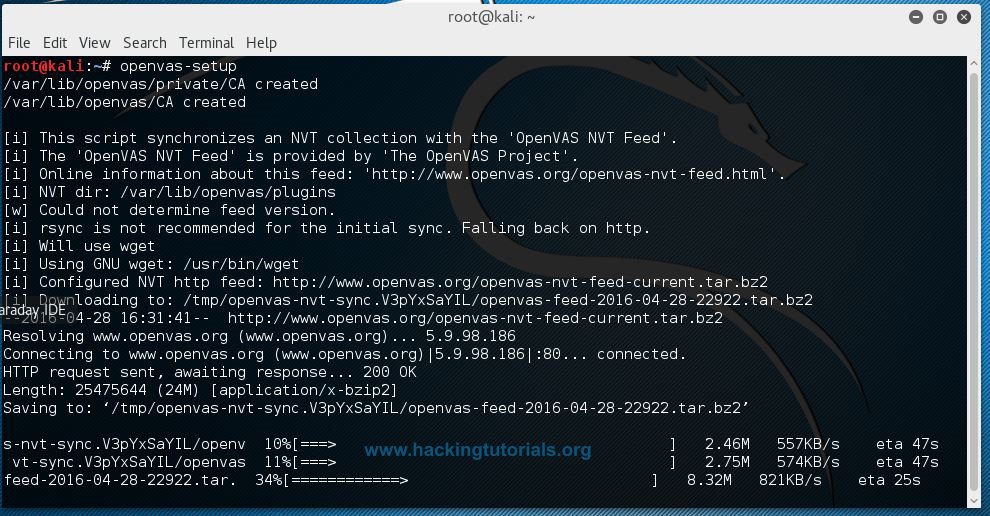
Run the following command to start the setup process:
openvas-setup
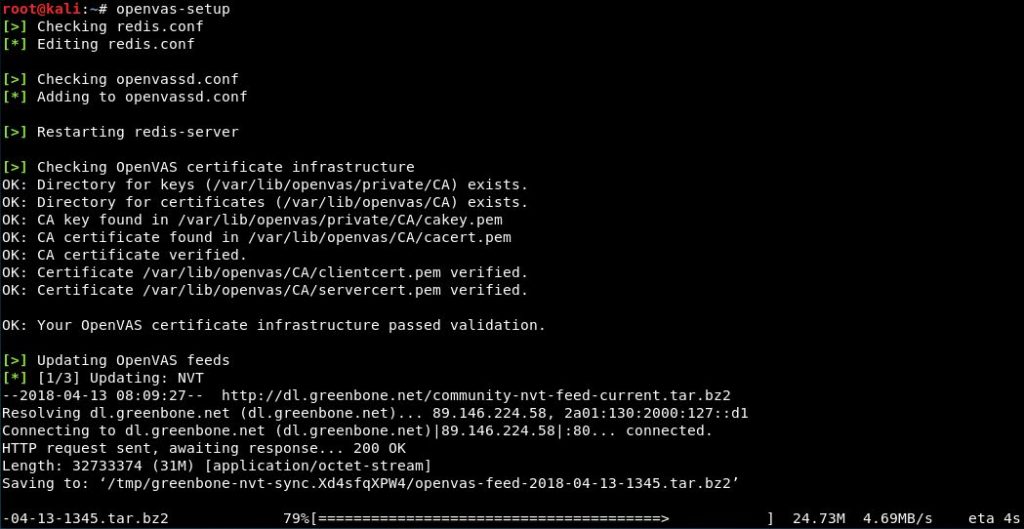
Setup process is running.
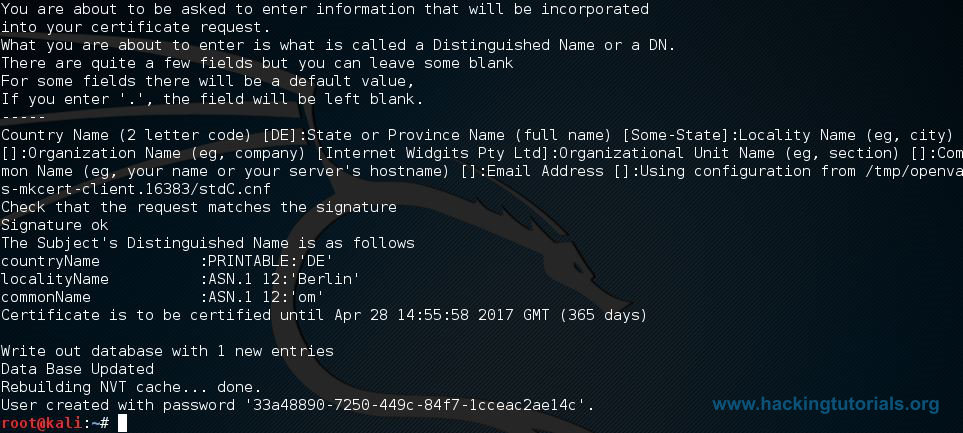
When the setup process is finished, all required OpenVAS processes are started and the web interface will be opened automatically. The web interface is running locally on port 9392 and can accessed through: https://localhost:9392. OpenVAS will also setup and admin account and automatically generate a password for this account which is displayed in the last section of the setup output:
Take note of the admin password generated by openvas-setup.
Password reset
Did you forgot to note down the password? You can change the admin password using the following commands:
openvasmd --user=[username]--new-password=[password]
openvasmd --user=admin --new-password=[password]
The next step is to accept the self-signed certificate warning and use the automatically generated admin credentials to login on the web interface:
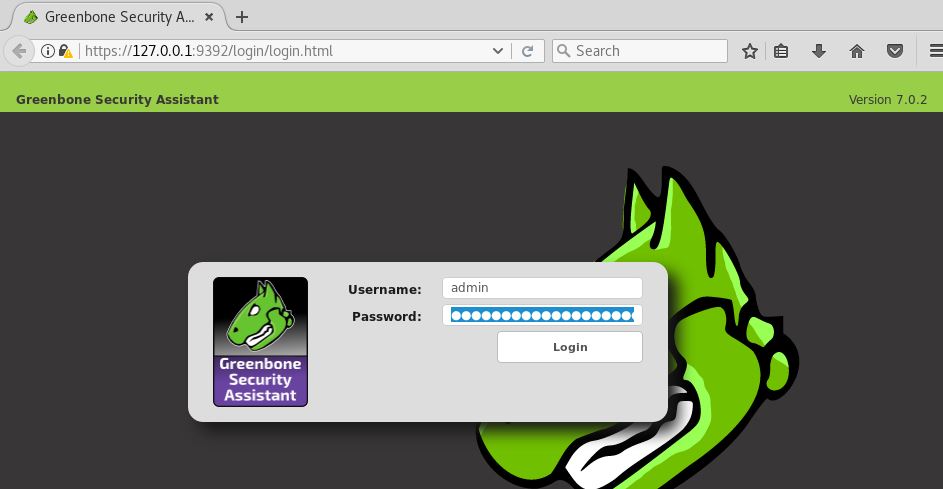
Accept the self-signed certificate warning and use the generated admin credentials to login.
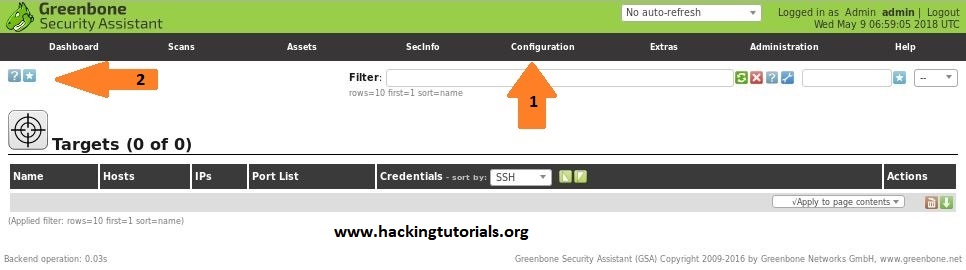
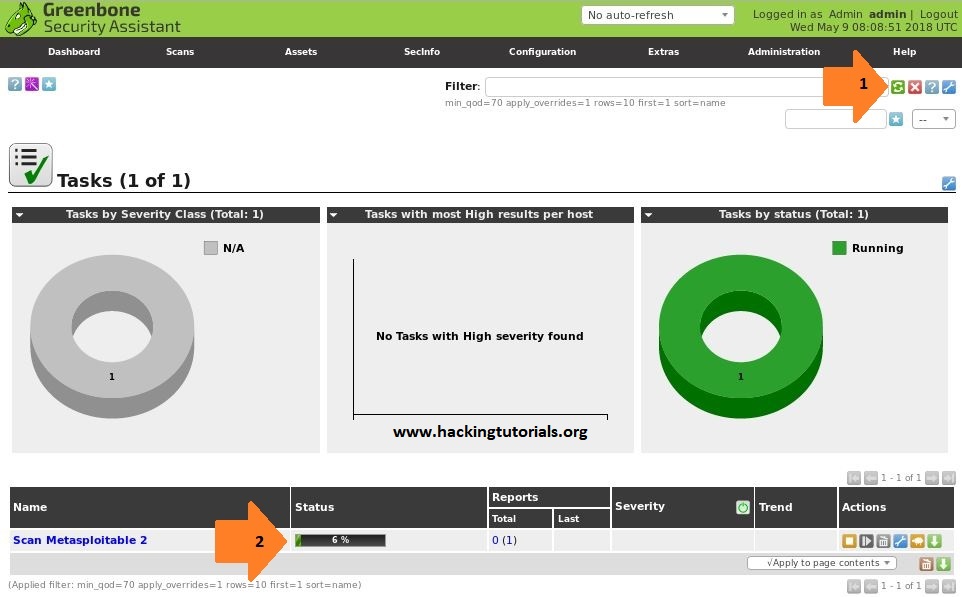
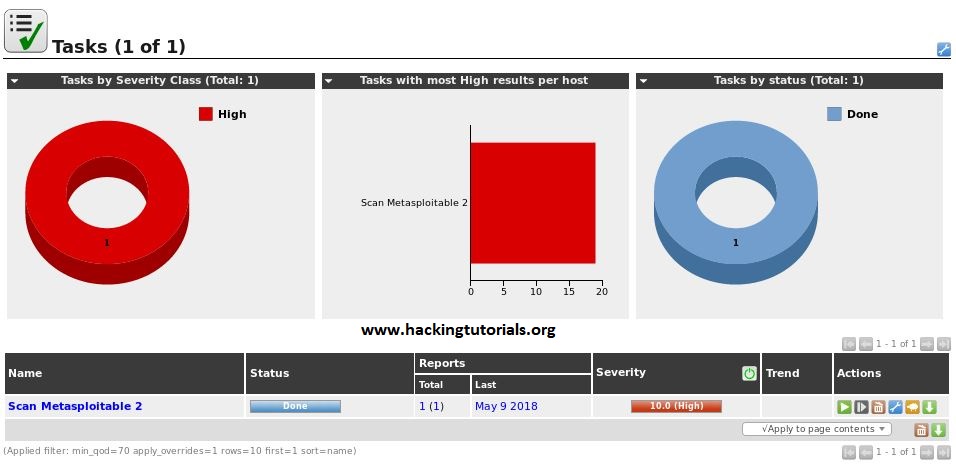
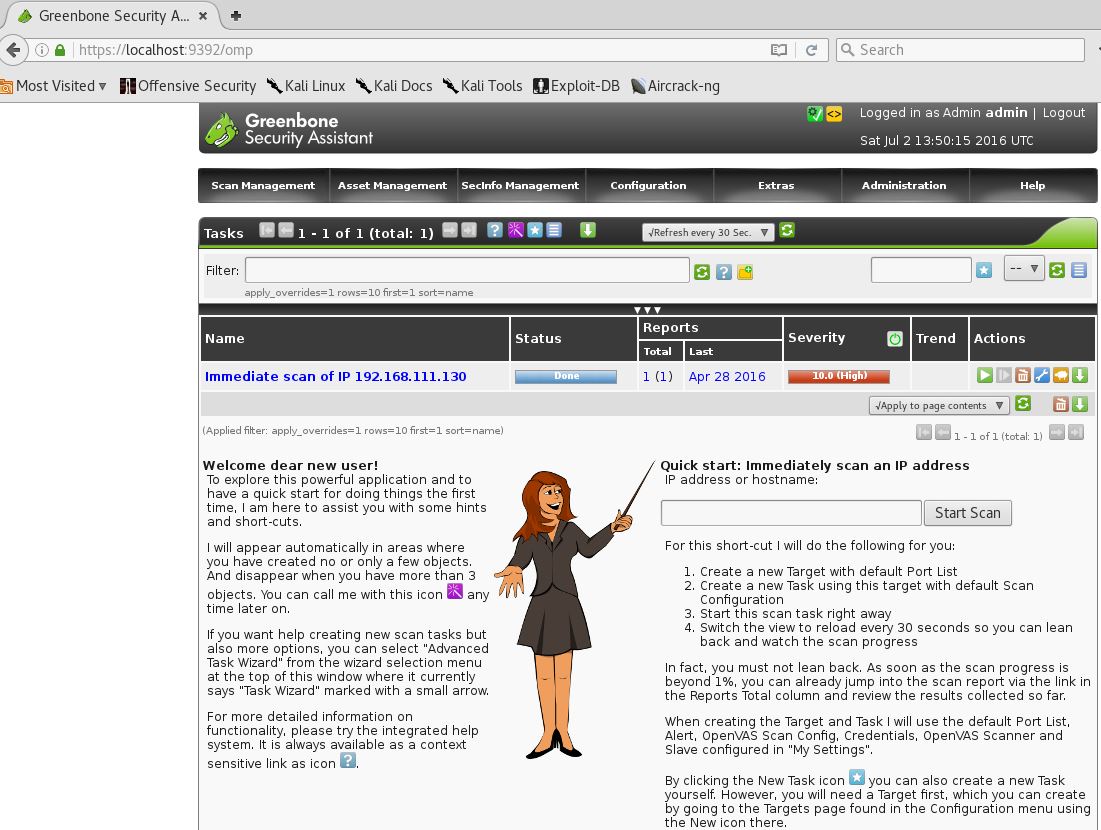
After logging in on the web interface we’re redirected to the Greenbone Security Assistant dashboard. From this point on we can start to configure and run vulnerability scans.
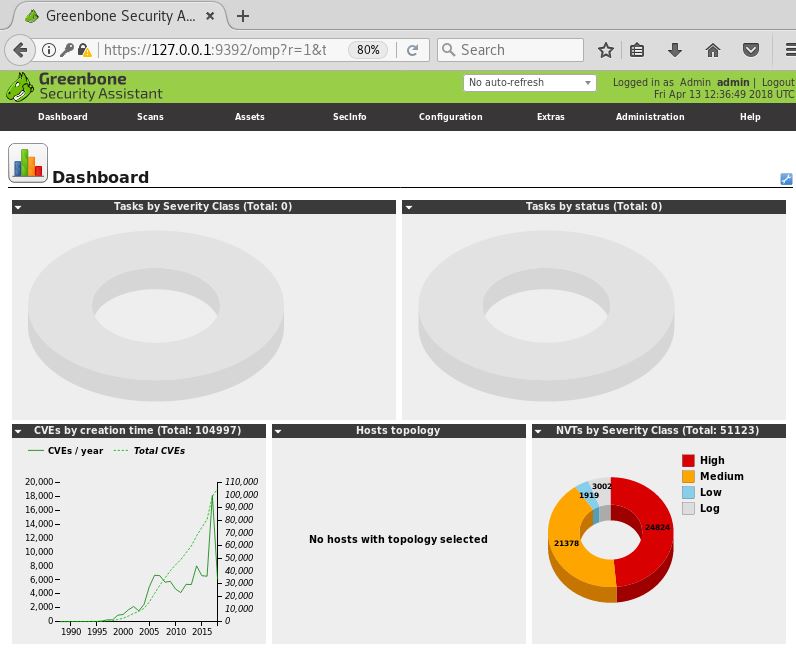
Greenbone Security Assistant: Web interface dashboard.

Starting and stopping OpenVAS

The last step I want to point out before we head on with the installation of the virtual appliance is how to start and stop OpenVAS services. OpenVAS services may consume a lot of unnecessary resources and therefore it is advised to terminate these services when you’re not using OpenVAS.
Run the following command to stop the services:
openvas-stop
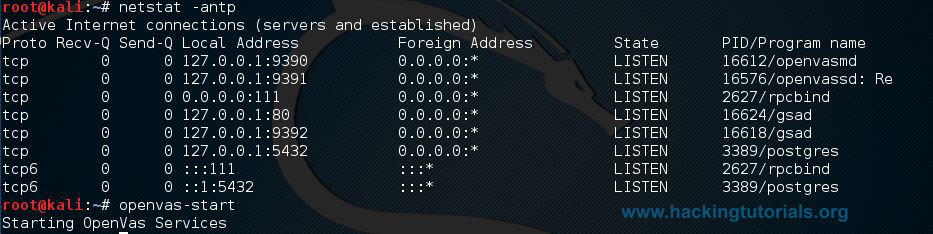
To start the OpenVAS services again, run:
openvas-start

Setting up the OpenVAS Virtual Appliance

Instead of installing OpenVAS on Kali Linux we can also install the OpenVAS virtual appliance in a network and configure it to periodically run scans on the network. The virtual appliance can be downloaded using the following link: http://www.openvas.org/vm.html
After downloading the virtual appliance from the OpenVAS website we have to configure a new virtual machine. In this tutorial we will be using VMware but you can also use other hypervisors such as Hyper-V on Windows or Oracle VirtualBox. In production environments you will most likely use VMware ESXi, Microsoft Hyper-V or other hypervisors. Let’s start with configuring a VM with the following specifications:
  • Processor cores: 2
  • 2 GB RAM
  • 10 GB Hard disk
  • Network: NAT (only when using VMware Workstation/Free/Virtualbox)
  • CD/DVD drive: ISO (choose the downloaded iso file as medium)
  • Guest operating system: Linux Kernel 4.x or later 64-bit (VMWare) or Other Linux (64bit) (VirtualBox)
The next step is to boot the virtual machine which will take us to the following installation menu:
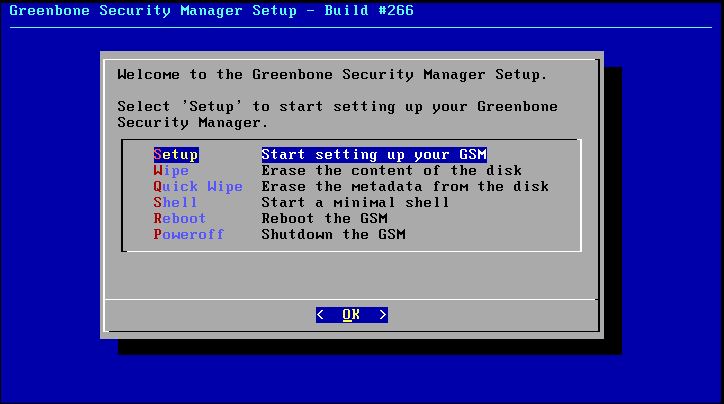
Choose setup to install the GSM appliance.
From this menu choose the setup option. Next we’re asked if we really want to format the hard drive, choose yes:
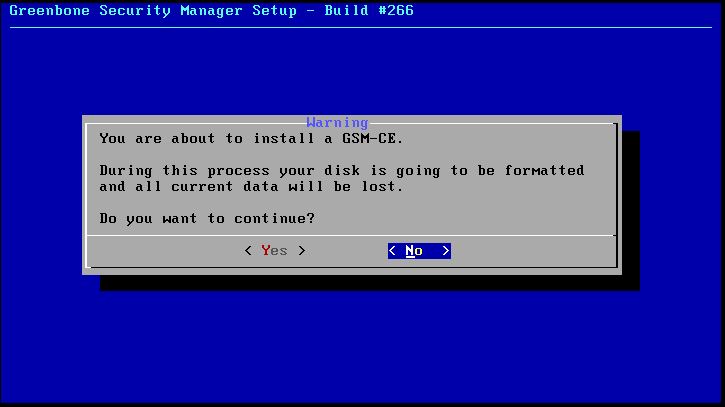
Choose yes to proceed with the installation.
The virtual appliance will be installed which might take a while. When the installation process is finished we have to specify a username for the administrator user. We’ll keep it default as admin as well as the password:
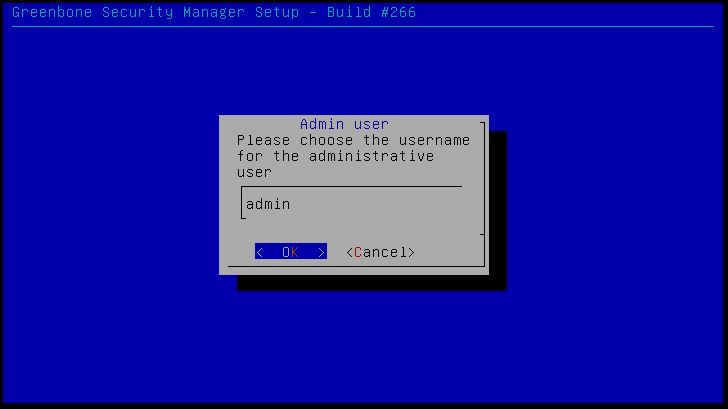
Choose the admin username/password.
Tip: If you’re installing the appliance in your production network make sure that you choose a strong password for the administrative account.
After specifying the username and password we’re asked to reboot the machine, choose ‘yes’ to reboot and also to eject the installation medium:
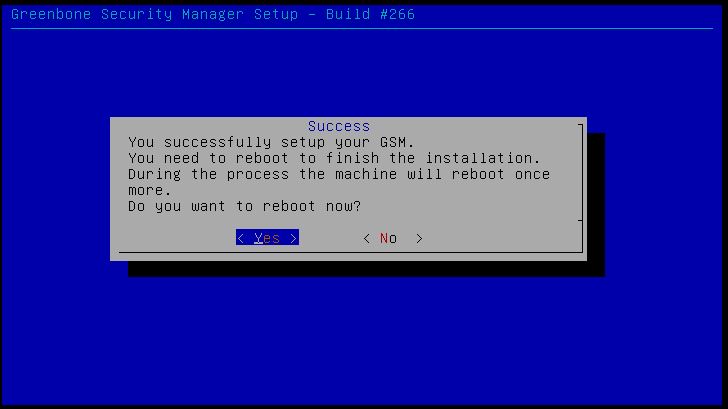
Choose Yes to reboot the machine.
After the virtual machine has rebooted (twice) we’re taken to a login screen looking as follows:
Appliance login
Note: After the first reboot we’re presented with a different login screen, just wait until the second reboot happens.
Here we can login using the credentials we’ve created earlier in the installation process (username: admin). After logging in we’re presented with the following message which tells us OpenVAS has not been fully configured yet. From here we can proceed with the setup process. Choose ‘yes’ in the following menu the proceed with the setup process:
Choose ‘Yes’ to configure GSM.
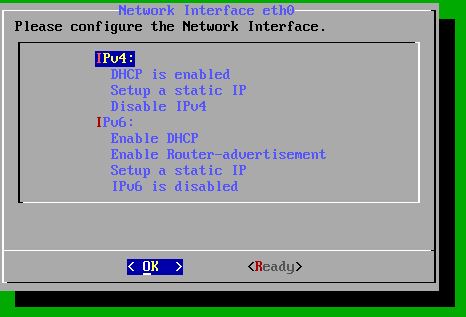
Next, we’re asked to configure an IP address for the appliance, choose ‘yes’:
Choose ‘Yes’.
For our test setup we’ll keep the network configuration default and have it assigned an IP address by our DHCP server. Optionally you can set a static IP address which is of course the recommended option in a production environment. Choose ‘Ready’ to proceed:
The next step is to create a web-admin user, choose ‘Yes’ in the following menu:
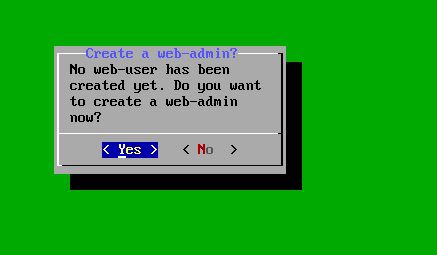
Choose web-user username and password.
Create the user by choosing a username and password:
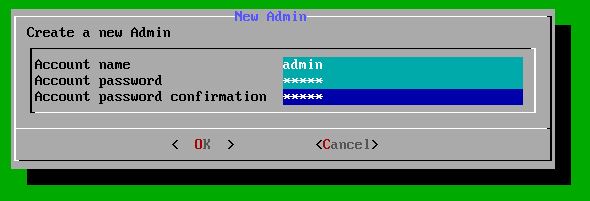
Create the web-admin user by specifying a username and password.
Finally we’re ask about a subscription key, unless you’re in the possession of a subscription key, choose ‘skip’ which will provide us with the Greenbone community feed:
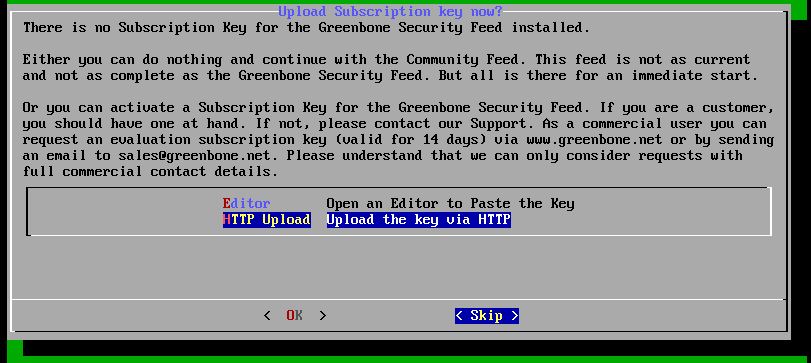
Choose ‘skip’ if you don’t have a subscription key.
Next we’re asked if we want to update the feed, choose ‘yes’ to upgrade the feed in the background. After running through all settings we can log out or reboot the appliance and we’re presented with an IP address to access the web interface:
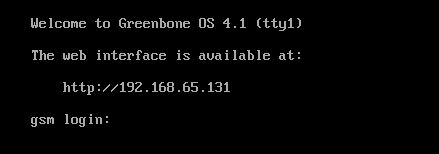
IP address for the web interface.
When we browser to the web interface we’re presented with a login page. Use the credentials of the web-admin account we’ve created during the configuration process:
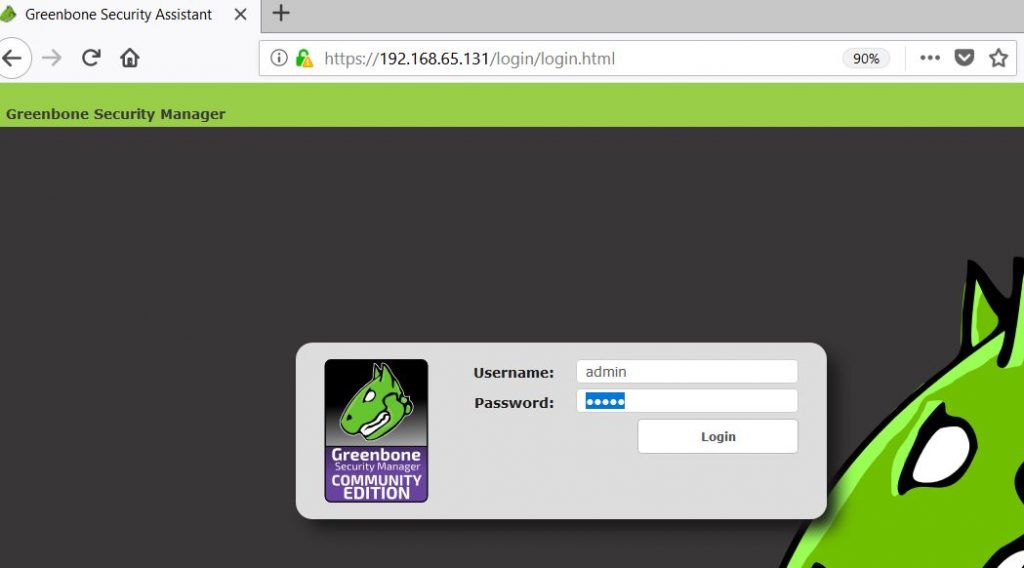
Use the web-admin account to login.
At this point we’ve got a fully functional OpenVAS virtual appliance up and running that can be configured to run vulnerability scans. This will conclude the installation process of the appliance. In part 2 (will be published on 9 May 2018) we will continue with configuring targets, assets and run vulnerability scans.
Virtual Hacking Labs - Penetration testing lab
Is the previous tutorial Vulnerability Scanning with OpenVAS 9.0 part 1 we’ve gone through the installation process of OpenVAS on Kali Linux and the installation of the virtual appliance. In this tutorial we will learn how to configure and run a vulnerability scan. For demonstration purposes we’ve also installed a virtual machine with Metasploitable 2 which we’ll target with OpenVAS. If you don’t know how to install Metasploitable you can check out the installation tutorial for Metasploitable 2 (scroll down a bit) or Metasploitable 3.
Before we can actually start vulnerability scanning with OpenVAS 9, we have to complete the following tasks:
  1. Create and configure a target.
  2. Create and configure a scan task.
  3. Run the scan.
At this point of the tutorial you need to have OpenVAS 9.0 installed and configured. If you haven’t done this at this point I recommend to follow part 1 of vulnerability scanning with OpenVAS first. To follow along it is also recommended to have a vulnerable Metasploitable machine up and running that is accessible from the OpenVAS appliance or the Kali Linux VM you’ve installed OpenVAS on. The lab setup used for this tutorial looks as follows:
  • Host machine with VMWare Workstation Pro 12.
  • Kali Linux 2018.2 VM with OpenVAS 9.0 installed (192.168.65.128).
  • Metasploitable 2 VM (192.168.65.137).
All virtual machines use the NAT network which can be configured in the network settings on the network adapter. Now that we’ve got everything up and running, let’s start with configuring a target and a scan task.
Tip: Did you forgot to write down or change your OpenVAS admin password? Check out the installation tutorial to find out how to reset the admin password.

1 Creating a target in OpenVAS

The first step is to create and configure a target using the OpenVAS/Greenbone Security Assistant web interface. This newly created target is selected in the following step where we configure a scanning task.
To create a target, we need to follow 2 steps:
  1. Go to ‘Configuration’ in the top menu and select ’Targets’.
  2. Click the blue icon in the top left corner to create a new target.
Vulnerability scanning
Click configuration and then new target.
After hitting the new target button, a dialog screen appears where we have to enter the following information:
  1. Target name, we’ll name it Metasploitable 2.
  2. The target IP host which is the IP address for our Metasploitable 2 lab machine.
Keep all other settings default and click the ‘Create’ button.
02 Create a target-2
Enter the target name, IP and click create.
The newly created target will now appear in the list of available targets:
03 Create a target-3
Newly created target.
Now that we’ve got our target all set up, let’s continue with creating a scan task that will scan the Metasploitable 2 target for vulnerabilities.

2 Configuring a scanning task in OpenVAS

In this section of the tutorial we will create a new scanning task. A scanning task defines which targets will be scanned and also the scanning options such as a schedule, scanning configuration and concurrently scanned targets and NVTs per host. In this tutorial we will just create a scan task and use default scan configurations. In Vulnerability Scanning with OpenVAS 9.0 part 3 (Will be published on: May 25 2018) we will have a more detailed look into scanning configurations.
To create a new scan task, we have to perform the following steps:
  1. Go to ‘Scans’ in the top menu and select ’Tasks’.
  2. Point to the blue icon in the top left corner and select ‘New Task’.
04 Create a scan task-1
Click scans -> Tasks and then new task.
After clicking the new scan option, a dialog screen appears where we have to enter the following information:
  1. Task name, we’ll name it ‘Scan Metasploitable 2’.
  2. Make sure that the Metasploitable 2 target we’ve created earlier is selected.
  3. Tick the schedule once checkbox.
  4. Keep all other settings default and click the ‘Create’ button to create the new task.
05 Create a scan task-2
Enter the task name, target and schedule the task only once.
The newly created task will now appear in the task list as follows:
06 Create a scan task-3
Newly created scan task.
There’s also a few other options to create scan tasks. We can use the scan task wizard to instantly scan a target and also the advanced scan task wizard which gives a few more options to configure. For demonstration purposes we’ll stick with the task we’ve just created.
Now that we’ve configured the scan task and added the Metasploitable 2 machine to the target list, all that remains is to run the task and wait for the results.

3 Running the OpenVAS vulnerability scan

To run the newly created task we just have to click the green start button as follows:
Run the scan task.
The scan task will now execute against the selected target. Please note that full scan may take a while to complete. When you refresh the tasks page you will be able to check the progress for the executed task:
  1. Reload the page.
  2. Check task status/progress.
08 Run scan task-2
Vulnerability scan in progress…
After waiting a while the scan task is finished and the status changes to ‘Done’:
Vulnerability scan finished
As expected we can see that OpenVAS found a number of severe vulnerabilities. Let’s have a look at the details of the results.

4 Interpreting the scan results

Now that the vulnerability scan is finished we can browse to ‘Scans -> Reports’ in the top menu. On the reports page we can find the report for the completed scanning task:
Vulnerability scanning report
By clicking the report name we can get an overview of all discovered vulnerabilities on the Metasploitable 2 machine, which is a lot as already expected. The results are ordered on severity rate by default:
Discovered vulnerabilities.
When we click on the vulnerability name we can get an overview of the details regarding the vulnerability. The following details apply to a backdoor vulnerability in Unreal IRCD we’ve covered in an earlier tutorial:
Vulnerability details
Vulnerability details.
Finally, we can also export the report in a variety of formats, such as: XML, HTML and PDF. WE can do this by selecting the desired format from the drop-down menu and click the green export icon as follows:
Export vulnerability report to PDF
Export vulnerability report to PDF.
For now, this will conclude part 2 of the vulnerability scanning with OpenVAS tutorial. In the next and final part, we will be focusing on custom scanning configurations to fine tune our scanning needs. Part 3 of vulnerability scanning with OpenVAS will be published on May 25.
Virtual Hacking Labs - Penetration testing lab
In this tutorial we will be using a Nmap script to scan a target host for SMB vulnerabilities. SMB stands for Server Message Block and does not have a great reputation when it comes the security and vulnerabilities. SMB1 was used in Windows 2000 and Windows XP which allowed null sessions which could be used to retrieve a great deal of information about the target machine. Later versions of SMB were also subject to many vulnerabilities which allowed anything from remote code execution to stealing user credentials. For this reason every penetration test should be checking for SMB vulnerabilities.
We will be using NMap scripts to scan a target host for SMB vulnerabilities. The Nmap Scripting Engine (NSE) is on of Nmap’s most powerful and flexible features. With the latest version, nmap 7.0 the scripting engine has been greatly expanded, Nmap 7 contains more than 170 new scripts. Let’s continue this tutorial with scanning for SMB vulnerabilities with Nmap: The frontpage on Samba.org describes Samba as:
Since 1992, Samba has provided secure, stable and fast file and print services for all clients using the SMB/CIFS protocol, such as all versions of DOS and Windows, OS/2, Linux and many others. Samba is an important component to seamlessly integrate Linux/Unix Servers and Desktops into Active Directory environments. It can function both as a domain controller or as a regular domain member.

Scanning from SMB vulnerabilities

The following command executes Nmap with a script:
nmap --script [scriptname]-p [port][host]
If nmap returns an error try to add --script-args=unsafe=1 so we get the status for SMB vulnerabilities:
nmap --script [scriptname]--script-args=unsafe=1 -p [port][host]
To have Nmap scan a target host for SMB vulnerabilities, use the following command:
nmap --script smb-check-vulns.nse --script-args=unsafe=1 -p445 [host]
The following command enumerates the SMB shares on a target host:
nmap --script smb-enum-shares.nse --script-args=unsafe=1 -p445 [host]
There is also a script for OS discovery which uses SMB:
nmap --script smb-os-discovery.nse --script-args=unsafe=1 -p445  [host]
Use the following command to enumerate the users on a target host:
nmap --script smb-enum-users.nse --script-args=unsafe=1 -p445 [host]

Scanning a host for MS17-010 Eternalblue with Nmap

You can also use Nmap to scan a target, or a range of targets, for MS17-010. Before we can run this scan we need to download the “smb-vuln-ms12-010.nse” script first from the link below:
https://raw.githubusercontent.com/cldrn/nmap-nse-scripts/master/scripts/smb-vuln-ms17-010.nse
Store the file in the Nmap scripts directory and then launch the scan as shown below:
nmap -p 445 -script=smb-vuln-ms17-010.nse [host]
The following command targets a range of hosts in your network:
nmap -p 445 -script=smb-vuln-ms17-010.nse [host-range]

SMB Vulnerabilities Video Tutorial

Thanks for watching and please subscribe to my YouTube channel :)

Related Nmap Hacking Tutorials

Open Port Scanning and OS Detection with Nmap in Kali Linux
Scanning a network for live hosts with Nmap
How to enumerate webserver directories with Nmap
Scanning for SMB vulnerabilities using Nmap
Heartbleed SSL bug Scanning using Nmap on Kali Linux
Virtual Hacking Labs - Penetration testing lab

Check out these SMB related hacking tutorials too:
Exploiting Eternalblue for shell with Empire


Eternalromance Getting shell on Windows 2003 Server
In this tutorial we are going to use Nmap in Kali Linux to scan for open ports scan and we will be using OS detection. Nmap stands for Network Mapper and is an open source tool for network exploration and security auditing which comes standard with Kali Linux but is also available for Windows, OSX and many other UNIX platforms. Nmap also has a graphical user interface called Zenmap.
First I want to start off with a little warning: Please be careful using the more aggressive functions of Nmap against hosts you do not own or do not have permission to scan. It may be against your ISP’s terms to use some Nmap features.

Open Port Scanning and OS Detection

Let’s start with a ping scan on an IP range to determine live hosts using the following command:
nmap -sP 192.168.0.0-100
Next we will start a SYN scan with OS detection on one of the live hosts using the following command:
nmap -sS [ip address]-O
nmap open port scanning and os detection 1
Now we will start an open port scan with version detection using the following command:
nmap -sV 192.168.0.1 -A
nmap open port scanning and os detection 2
When we add -v to the command we can increase the verbosity :
nmap -sV 192.168.0.13 -A -v

Nmap Open Port Scanning and OS Detection Video Tutorial

Thanks for watching and please subscribe to my YouTube channel :)

Nmap options summary

Usage: nmap [Scan Type(s)] [Options] {target specification}
TARGET SPECIFICATION:
Can pass hostnames, IP addresses, networks, etc.
Ex: scanme.nmap.org, microsoft.com/24, 192.168.0.1; 10.0.0-255.1-254
-iL : Input from list of hosts/networks
-iR : Choose random targets
--exclude : Exclude hosts/networks
--excludefile : Exclude list from file
HOST DISCOVERY:
-sL: List Scan – simply list targets to scan
-sn: Ping Scan – disable port scan
-Pn: Treat all hosts as online — skip host discovery
-PS/PA/PU/PY[portlist]: TCP SYN/ACK, UDP or SCTP discovery to given ports
-PE/PP/PM: ICMP echo, timestamp, and netmask request discovery probes
-PO[protocol list]: IP Protocol Ping
-n/-R: Never do DNS resolution/Always resolve [default: sometimes]
--dns-servers : Specify custom DNS servers
--system-dns: Use OS’s DNS resolver
--traceroute: Trace hop path to each host
SCAN TECHNIQUES:
-sS/sT/sA/sW/sM: TCP SYN/Connect()/ACK/Window/Maimon scans
-sU: UDP Scan
-sN/sF/sX: TCP Null, FIN, and Xmas scans
--scanflags : Customize TCP scan flags
-sI : Idle scan
-sY/sZ: SCTP INIT/COOKIE-ECHO scans
-sO: IP protocol scan
-b : FTP bounce scan
PORT SPECIFICATION AND SCAN ORDER:
-p : Only scan specified ports
Ex: -p22; -p1-65535; -p U:53,111,137,T:21-25,80,139,8080,S:9
--exclude-ports : Exclude the specified ports from scanning
-F: Fast mode – Scan fewer ports than the default scan
-r: Scan ports consecutively – don’t randomize
--top-ports : Scan most common ports
--port-ratio : Scan ports more common than
SERVICE/VERSION DETECTION:
-sV: Probe open ports to determine service/version info
--version-intensity : Set from 0 (light) to 9 (try all probes)
--version-light: Limit to most likely probes (intensity 2)
--version-all: Try every single probe (intensity 9)
--version-trace: Show detailed version scan activity (for debugging)
SCRIPT SCAN:
-sC: equivalent to --script=default
--script=is a comma separated list of
directories, script-files or script-categories
--script-args=: provide arguments to scripts
--script-args-file=filename: provide NSE script args in a file
--script-trace: Show all data sent and received
--script-updatedb: Update the script database.
--script-help=: Show help about scripts.
is a comma-separated list of script-files or
script-categories.
OS DETECTION:
-O: Enable OS detection
--osscan-limit: Limit OS detection to promising targets
--osscan-guess: Guess OS more aggressively
TIMING AND PERFORMANCE:
Options which take 
FIREWALL/IDS EVASION AND SPOOFING:
-f; --mtu : fragment packets (optionally w/given MTU)
-D : Cloak a scan with decoys
-S : Spoof source address
-e : Use specified interface
-g/--source-port : Use given port number
--proxies : Relay connections through HTTP/SOCKS4 proxies
--data : Append a custom payload to sent packets
--data-string : Append a custom ASCII string to sent packets
--data-length : Append random data to sent packets
--ip-options : Send packets with specified ip options
--ttl : Set IP time-to-live field
--spoof-mac : Spoof your MAC address
--badsum: Send packets with a bogus TCP/UDP/SCTP checksum
OUTPUT:
-oN/-oX/-oS/-oG : Output scan in normal, XML, s| and Grepable format, respectively, to the given filename.
-oA : Output in the three major formats at once
-v: Increase verbosity level (use -vv or more for greater effect)
-d: Increase debugging level (use -dd or more for greater effect)
--reason: Display the reason a port is in a particular state
--open: Only show open (or possibly open) ports
--packet-trace: Show all packets sent and received
--iflist: Print host interfaces and routes (for debugging)
--log-errors: Log errors/warnings to the normal-format output file
--append-output: Append to rather than clobber specified output files
--resume : Resume an aborted scan
--stylesheet : XSL stylesheet to transform XML output to HTML
--webxml: Reference stylesheet from Nmap.Org for more portable XML
--no-stylesheet: Prevent associating of XSL stylesheet w/XML output
MISC:
-6: Enable IPv6 scanning
-A: Enable OS detection, version detection, script scanning, and traceroute
--datadir : Specify custom Nmap data file location
--send-eth/--send-ip: Send using raw ethernet frames or IP packets
--privileged: Assume that the user is fully privileged
--unprivileged: Assume the user lacks raw socket privileges
-V: Print version number
-h: Print this help summary page

Related Nmap Hacking Tutorials

Open Port Scanning and OS Detection with Nmap in Kali Linux
Scanning a network for live hosts with Nmap
How to enumerate webserver directories with Nmap
Scanning for SMB vulnerabilities using Nmap


Heartbleed SSL bug Scanning using Nmap on Kali Linux
In this tutorial we will be installing OpenVAS on Kali linux. OpenVAS is an advanced open source vulnerability scanner and manager and can save you a lot of time when performing a vulnerability analysis and assessment. Using an automated up-to-date vulnerability scanner in penetration test often helps you to find vulnerabilities which can be easily overlooked during a manual assessment. The OpenVAS scanner uses more than 47.000 Network Vulnerability Tests (NVTs) as of June 2016.
In this tutorial we will be installing OpenVAS on the Virtual Kali Linux machine we’ve installed in an earlier tutorial. If you haven’t installed Kali Linux yet we recommend you to do that first. The OpenVAS installation process is rather straight forward but might need some explanation along the way. After the installation process is finished we will be scanning the Metasploitable 2 vulnerable machine we’ve installed earlier in the Metasploitable 2 installation tutorial for known vulnerabilities.

OpenVAS installation

Let’s start with installing OpenVAS and run the following commands in a terminal session to download and install OpenVAS:
apt-get install openvas
openvas-setup
Installing OpenVAS on Kali LinuxThe last commands is setting up OpenVAS and is synchronizing the NVT feed with the NVT collection on your machine. Depending on your connection speed this might take a while to finish.
When the installation process is finished you will be presented a long password on the last line of the console. This password is used to login to the OpenVAS web interface so you need to save it somewhere and change it after the first login.
OpenVAS setup password
When the OpenVAS setup process is finished the OpenVAS manager, scanner and services are listening on port 9390, 9391, 9392 and on port 80. You can use the following netstat command to check if these services are listening:
netstat –antp
OpenVAS setup netstat -antp
Netstat –antp command Explained
-a all
-n show ip instead of host names
-t show only tcp connections
-p show process id/name

Running OpenVAS

If the OpenVAS services are not running than use the following command to start these services:
openvas-start
Than connect to the web interface using a browser and point it to:
https://127.0.0.1:9392
Accept the self-signed SSL certificate and sign in with user ‘admin’ and the password generated during the setup process. The web interface after logging in should look like this:
OpenVAS scanning interface

Scanning Metasploitable 2 with OpenVAS

Starting a scan with OpenVAS is very easy and straightforward. Just enter the target’s hostname or IP address in the quick start field and press the ‘Start Scan’ button. Make sure you only scan targets with OpenVAS you physically own or have (written) permission to scan. OpenVAS vulnerability scanner will generate a lot of network traffic which may lead to crashes or DOS.
When the scan is finished click to the reports page under the Scan Management menu and have a look at an overview of the scan results:
OpenVAS vulnerability reports
As you can see the Metasploitable 2 vulnerable machine contains 19 high, 32 medium and 6 low rated severity vulnerabilities. When you click on a report you can see a more detailed overview of the found vulnerabilities. The list of known vulnerabilities is ordered on severity:
OpenVAS vulnerability overview 6
OpenVas offers a lot more functionality, including the vulnerability database from the feed categorized in CVE’s, NVT’s and CPE’s. The SecInfo Management tool also offers a nice dashboard showing some high level statistics on vulnerabilities:
OpenVAS Sec Info vulnerability dashboard
With the vulnerability dashboard we will conclude this tutorial. We recommend you to get familiar with OpenVAS, the reports and the vulnerability database by running more scans and compare the results with other vulnerability scanner. Hopefully this tutorial has proven useful to you and will get you started in automated vulnerability scanner. Happy Scanning!
Virtual Hacking Labs - Penetration testing lab